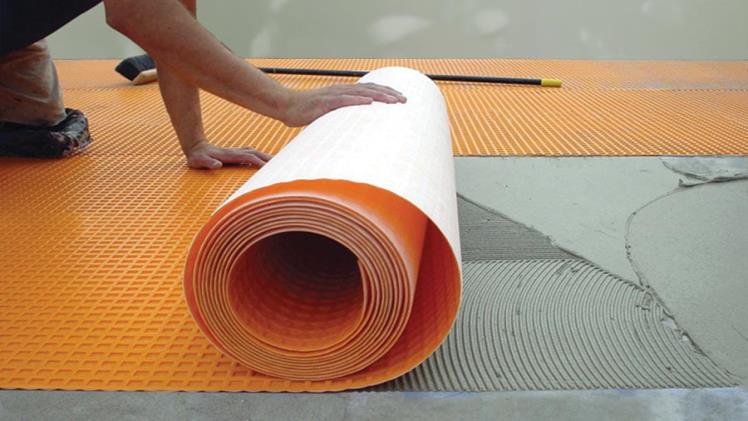
If you plan to install a new tile floor, you might have encountered the term “uncoupling membrane.” The most popular uncoupling membrane on the market today is the Schluter-DITRA membrane. This article will provide you with everything you need to know about the DITRA uncoupling membrane, including its features, benefits, and how to install it.
What is DITRA Uncoupling Membrane?
DITRA is an uncoupling membrane designed for tile installations. It is made of polyethylene and has a grid pattern on one side and a fleece layer on the other. The grid pattern is designed to create a mechanical bond between the membrane and the tile adhesive, while the fleece layer allows for the easy embedding of the membrane in the tile adhesive.
Features of DITRA Uncoupling Membrane
This DITRA uncoupling membrane offers several unique features that make it a popular choice for tile installations. Here are some of its most notable features:
Uncoupling
One of the primary features of the DITRA uncoupling membrane is its ability to uncouple the tile layer from the substrate. This uncoupling prevents the transfer of stresses between the two layers, which can lead to cracks in the tile.
Waterproofing
DITRA uncoupling membrane is waterproof, which makes it an ideal choice for wet areas, such as bathrooms and showers.
Vapor Management
The membrane’s unique design allows for the free flow of moisture vapor through the matting, which helps to prevent moisture buildup beneath the tile.
Load Distribution
The DITRA uncoupling membrane is designed to distribute loads over a large area, which helps to reduce point loads that can lead to tile cracking.
Easy to Install
The installation process for DITRA uncoupling membrane is relatively simple, which makes it an attractive option for DIYers. It can be easily cut to size with a utility knife and is lightweight, which makes it easy to handle and transport.
Benefits of DITRA Uncoupling Membrane:
DITRA uncoupling membrane has several benefits in your tile installation project. Here are some of the most notable benefits:
Crack Prevention
The primary benefit of using a DITRA uncoupling membrane is the prevention of cracks in the tile. The uncoupling membrane allows for the free movement of the tile layer, which prevents the transfer of stresses between the tile and substrate. This, in turn, helps to prevent cracks from developing in the tile.
Waterproofing
DITRA uncoupling membrane is waterproof, which makes it an ideal choice for wet areas, such as bathrooms and showers. The membrane helps to prevent moisture buildup beneath the tile, which can lead to mold and mildew growth.
Easy to Install
DITRA uncoupling membrane is lightweight and easy to handle, which makes it an attractive option for DIYers. It can be cut to size with a utility knife, and the installation process is relatively straightforward.
Increases Durability
By uncoupling the tile layer from the substrate, DITRA uncoupling membrane helps to increase the durability of the tile installation. This, in turn, can help extend the tile’s lifespan.
Step-By Step guide for installation
Installing DITRA uncoupling membrane is a relatively straightforward process that requires some basic tools and materials. Here is a step-by-step guide to installing DITRA uncoupling membrane for your tile installation project.
- Materials and Tools Needed:
- DITRA uncoupling membrane
- Tile adhesive
- Utility knife
- Trowel
- Straight edge
- Measuring tape
- Pencil
- Bucket
- Sponge or damp cloth
Step 1: Prepare the Substrate
The first step in installing DITRA uncoupling membrane is to prepare the substrate. This involves ensuring that the surface is clean, level, and free of any debris. If necessary, you may need to use a leveling compound to ensure that the surface is level.
Step 2: Cut the DITRA Uncoupling Membrane to Size
Once the substrate is ready, you can begin cutting the DITRA uncoupling membrane to size. Measure the length and width of the area where you want to install the membrane and transfer these measurements onto the membrane using a pencil and a straight edge. Use a utility knife to cut the membrane to size.
Step 3: Apply the Tile Adhesive
Using a trowel, apply tile adhesive to the substrate in the area where you want to install the DITRA uncoupling membrane. Make sure to spread the adhesive evenly and cover the entire area where you install the membrane.
Step 4: Install the DITRA Uncoupling Membrane
Place the DITRA uncoupling membrane onto the adhesive with the fleece side facing up. Press the membrane down firmly to ensure that it adheres to the adhesive. Use a straight edge to ensure that the membrane is flat and level.
Step 5: Cut Out Holes for Obstacles
If there are any obstacles in the area where you are installing the DITRA uncoupling membrane, such as pipes or corners, you will need to cut out holes to accommodate them. Measure the size of the obstacle and transfer these measurements onto the membrane using a pencil and a straight edge. Use a utility knife to cut out the hole.
Step 6: Apply Tile Adhesive to the DITRA Uncoupling Membrane
Once the DITRA uncoupling membrane is installed, apply a layer of tile adhesive over the top of the membrane. Use a trowel to spread the adhesive evenly and ensure that it covers the entire membrane surface.
Step 7: Install the Tile
With the tile adhesive still wet, you can install the tile over the DITRA uncoupling membrane. Make sure to press the tile down firmly to ensure that it adheres to the adhesive. Use tile spacers to ensure that the tiles are evenly spaced.
Step 8: Grout the Tile
Once the tile is installed, allow the adhesive to dry for at least 24 hours. After the adhesive is dry, you can begin grouting the tile.
Step 9: Clean Up
After the grout is drying, use a wet pat or cloth to finish excessive grouts from the tile’s surface. Allow the grout to dry completely before using the tiled surface.

